Monday, January 9, 2012

Gluten Free Minestrone Soup

It is soup season at our house.  I especially love soups I can put together in the morning and only have to add a finishing touch(pasta) before eating.  My life is chaotic, especially right before dinner!  This soup is easy to put together and good to eat.  Last year when I had surgery, a good friend brought me this delicious soup and it has been a favorite ever since.  I like "vegetarian style" - it really isn't vegetarian because I add lots of beef bouillon, but I don't love ground meat in my soups.  Either way you like it, is just fine.  For those of you who have used gluten free pasta, you know it will go mushy over time if it just sits in broth.  When I make this soup I take out 1/2 of it before I add the pasta, and freeze it in a gallon freezer bag.  When I go to use it, all I have to do is boil some pasta and we are set with a hearty soup.  I say this with just about every recipe, but use whatever ingredients/spices you like or don't like, make it is thick or brothy, let your imagination run wild!  This soup is naturally dairy and soy free!
Minestrone Soup


6 c. water
4 carrots, chopped
2 stalks, celery, chopped
2 sm onions, chopped
1-12 oz. can tomato sauce
1 qt. tomatoes, blended
1 ½ T. parsley
2 t. oregano
1 t. basil
1 T. sugar
2 T. beef bouillon, 3T. if using no meat(I like the Better than Bouillon Organic Beef)
½ lb. browned and drained sausage or ground beef(optional)
1 can green beans, drained (I usually use a handful of frozen)
1 can red beans, drained
½ pkg. Tinkyada gluten free pasta, cooked 2 min. less


In a large pot mix everything but green beans, red beans and pasta.  Simmer several hours(about 2) until vegies are tender.  Add beans and cook an additional 15 min.  Cook pasta according to pkg. directions, drain, and add right before serving.  This goes awesome with my dinner rolls.
*This is linked to Linda's Gluten Free Wednesdays, check it out for some great recipes!

Tuesday, January 3, 2012

Gluten Free "Flatbread" or aka - "bready thing"


At our house, these are referred to as "bready things."  The first time my kids asked what they were, this was my reply because I didn't know what they really were called.  The name stuck, although I think they are similar to some type of middle eastern flat bread - who knows!  Anyway, whenever I make a soup that my kids don't love, I always make these.  Tonight we had these with my favorite chicken lime soup.  They know if they want more than one "bready thing," they have to eat their soup, of course it is their choice and they never complain.  Their favorite way to eat them is sprinkled with cinnamon sugar.  They are a little dense and I don't know if they are an acquired taste, but we like them.
Bready Thing
1/2 c. teff flour
1/2 c. sorghum flour
1 c. millet flour
1/2 c. tapioca flour
3 T. coconut flour
1 1/2 t. xanthan gum
1 t. salt
2 T. oil
1 1/4 -1 1 /2 c. warm water
butter for cooking
Combine all the dry ingredients, add the oil and most of the water and stir.  You want the dough to be a little sticky but dry enough to pinch into balls.  If you don't have coconut flour, and want to substitute it with another flour, you need to use 1/2 c. of a different flour for the 3T. of coconut flour. The coconut flour soaks up a lot of water and helps it form a great dough. Or if you use a flour mix, use 3 c. total.    You can also add any spices or herbs(I have done chopped cilantro and love it)  If the dough is too stiff, and more water, 1 t. at a time.  If it is too wet, add more flour, 1 t. at a time.  You really can't mess it up, you just have to get the dough the right consistancy.   Divide the dough into 12 balls and now the fun begins.  I use a gallon Ziploc bag and cut down the sides, spray it with Pam and place the ball inside.  Use a tortilla press, rolling pin, or heavy flat object and press or roll the ball into about a 6" circle, about 1/4" thick.  Thicker than a tortilla, thinner  than a pancake.  Heat a frying pan on medium and add 1 T. butter.  Make sure it is hot before you add the dough.  Toss in the circle of dough and let it cook until it starts to bubble and the edges look done, flip and cook 1 more minute on the other side.  You should have golden brown bubbles.  Remove the bread, add a little more butter and repeat 12 times.  I usually have 2 pans going at once.  Between the cooking I have time to roll out the next one and the process goes pretty quick.  You will then have 12 yummy bready things to go with your lovely dinner.  Be creative and use them as you wish, the possibilities are endless.  Let me know how you use yours!

This might sound harder than it really is, once you get the hang of it, it is really pretty easy.

Monday, December 19, 2011

Gluten Free Ice Cream Cake Roll

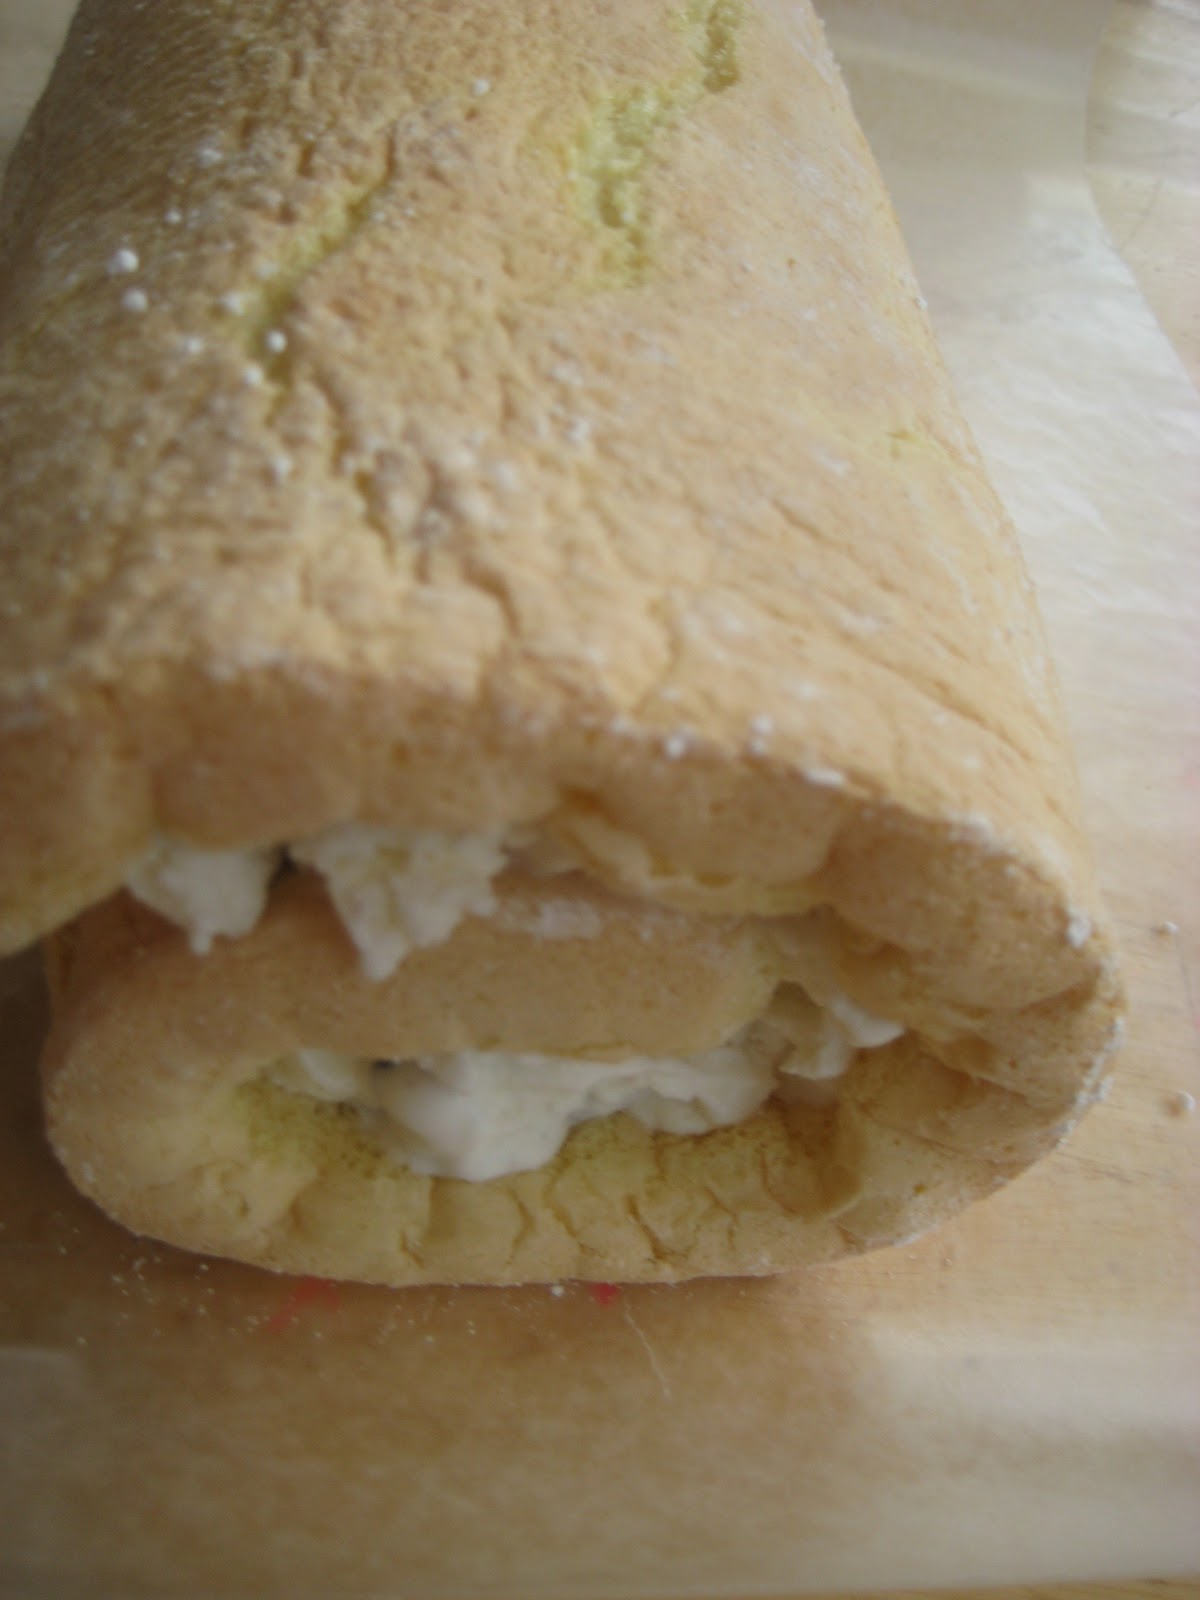
 This has been one of my favorite desserts since I was a little girl.  Our family eats a lot of these around the holidays, and it is usually the Christmas Eve dessert of choice.  If you have never made a cake roll, they really are easy to make, and I included some pictures to help.  Another plus, is that you can make it a few days before the event, therefore one less thing to do at the last minute!  We love to fill it with peppermint/candy cane/mint ice cream, however, you can do whatever you like.  Plus, you can fill it with a dairy/soy free ice cream as well.  Let your imagination run wild and top it off with some hot fudge.


Ice Cream Cake Roll
Beat until thick:    4 egg yolks
¼ c. sugar
½ tsp. vanilla
In another bowl, beat:     4 egg whites
                                      ½ c. sugar
Fold together and add:    1 tsp. baking powder
                                      ½ tsp. salt
                                      ½ tsp. xanthan gum
                                      ¼ c. each of millet flour, tapioca flour, potato starch
You need to use a jelly roll pan that measures 15"x10".  The big cookie sheets most people use are too big.  Grab your pan, grease it with shortening then put on some wax paper(this keeps the wax paper in place).  Then liberally grease the wax paper and pour batter into prepared pan and bake 375 for 12 min.(see pict. 2).   When done, turn onto a dish cloth sprinkled with powdered sugar(this will keep the cake from sticking to the towel).  Peel off the wax paper and roll(see pict. #3 & 4). When cool, unroll, fill with ice cream, roll back up and freeze(see picture #5).  Wrap it up in a few layers of foil to keep in the freezer until consumption.
Enjoy!
*Check out some other Holiday favorites at Linda's gluten-free-wednesdays!

Wednesday, December 7, 2011

Peppermint Patties - everything free!

 For those of you with lots of allergies, and who never get to enjoy a regular candy bar, this recipe is for you.  These are gluten free, dairy free, soy free, nut free, egg free, and free of lots of other stuff.  I am not a candy maker, but I can make these.  For those of you who know how to make candy, please don't shudder at my methods, just let me know an easier way or any tips you might have!  Here is the recipe and read on for the methods and substitutions.
Peppermint Patties
2 T. + 2 t. water
1 T. agave/honey
1 t. peppermint extract
3 3/4 c. powdered sugar
1 T. shortening
1 bag semi-sweet chocolate chips
Beat together: water, agave, peppermint, and 2 c. powdered sugar in a mixing bowl.  Add shortening and beat well.  Add remaining powdered sugar and mix well.  You should have a dough that won't stick to your fingers, and that you can roll into a ball.  If it is too thick, add a few drops of water; too thin, add a small amount of powdered sugar.
Roll dough into 36 1" balls(or whatever size you want), and place on a cookie sheet with wax paper.  Cover with another sheet of wax paper and use another pan to press down on the balls and flatten them to 1/4-1/2" thick.  I find this the easiest way.  You can also flatten them with a cup or anything else, this just seems to be the fastest and most uniform way.  They should look like picture #1. Throw them in the freezer and now onto the fun part. Time to melt the chocolate.  I dump the bag of chocolate chips in a bowl and place in the microwave.  I do 1 min. intervals and stir after each one until melted. Let cool. When your chocolate is ready, pull your tray of discs out of the freezer and it is time to dip.  I actually have no idea how to really dip chocolates.  Please let me know how you are really supposed to do this!  I wash my hands, grab a disc and drop it in the chocolate, make sure both sides are covered and place it back on the wax paper to harden.  With dripping hands I grab the next disc and repeat until they are all done.  Then I lick my fingers!  If the discs get to soft, throw them back in the freezer for a few minutes.  This makes them a lot easier to work with.   Place chocolate covered patties in the fridge until set.  See picture #2 for the finished product.   I usually store mine in the fridge, but they usually don't last very long!  If you love mint, you can sprinkle crushed candy canes on top of the wet chocolate, but  I am too lazy!  Enjoy your chocolate treat this wonderful holiday season!

*Substitutions-
Use Spectrum shortening for a soy free, trans-fat free option
Use Enjoy Life chocolate chips for soy and dairy free
     or just Guitard or Ghiridelli semi-sweet chocolate chips for dairy free

*Check out Linda's Chocolate Roundup for this month's challenge!

Tuesday, November 29, 2011

Chicken Wontonless Salad

I used to be one of those people who had to have something crunchy on my salad - croutons, wontons, chineese noodles, chips, etc.  Over the years I guess I have come to appreciate a salad for other reasons other than the unhealthy ones.  I love the dressing on this salad, it looks pretty boring, and if I just saw the recipe I wouldn't have tried it.  However, my good friend made it, and I was hooked after one bite.  It is mild, yet tasty, and very easy to whip up.  As like all my recipes, adapt this to your desires and portions and enjoy!
Chicken Wontonless Salad
2 chicken breasts, marinated in equal parts sugar and gf soy sauce(1/4 c. each), then baked at 350 until done(25 min) and diced
3 hearts of romaine, chopped
6 green onions, chopped
2 sm. cans mandarin oranges, drained
almonds
sesame seeds
not pictured, but would have added if had on hand
sugar snap peas
bean sprouts
Dressing
2 T. sugar
1 t. salt
1/4 c. oiil
1/2 t. pepper
1 t. sesame oil
1 T. rice vinegar
Shake together your dressing ingredients and pour over your chopped salad ingredients.  Pour on dressing right before eating for best results!

Tuesday, November 22, 2011

Double Layer - No-Bake - Pumpkin Pie(Gluten Free Style)

I know this isn't the loveliest picture, but it will have to do!  I made the top part dairy free and it didn't set up like it should.  If you use milk it should work just right!  Anyway, this is a favorite of mine that I prefer to regular pumpkin pie.  You get all the spicey goodness without any cooking.  The gingersnap crust makes a rich dessert that anyone will enjoy.  Anyone can make this because no special flours are required, just some special cookies that you can pick up at most stores.  I prefer to use Pamela's gingersnap cookies, but Kinnickinnick has a great S'morable cookie that would also work well.
Double Layer Pumpkin Pie

1 1/2 c. smashed GF gingersnaps         1 c. milk
3 T. melted butter                                 1 (15oz) can pumpkin
4 oz. cream cheese                              2 sm.pkg. instant vanilla pudding
1 T. milk                                              1 tsp. cinnamon
1 T. sugar                                            ½ tsp. ginger
4 oz cool whip                                     ¼ tsp. cloves

Mix gingersnaps and butter and press into pie pan. Bake at 350 for 8-10 min.  Cool completely.  Mix cream cheese, 1 T. milk and sugar - stir in cool whip.  Spread onto bottom of crust.  In another bowl, mix milk, pumpkin, pudding and spices.  Beat until well blended.  Pour over cream cheese layer.  Refrigerate 4 hours or until set.  Keep refrigerated.

It really is quick and easy and is best if you do it the night before.   Surprise your gluten free guests with this yummy pie.

Monday, November 14, 2011

Gluten Free Stuffing


The 1st Thanksgiving we ate gluten free, I announced to my husband that he would just have to do without, I was not attempting to make stuffing.  It felt so overwhelming, especially since most the bread we tried was disgusting!  Of course over time, the gluten free diet becomes much easier and so I did attempt to make stuffing.  Either my family forgot what it tasted like, or they are crazy, but they love it.  It is now a staple again.  I make a very plain stuffing, feel free to spice it up with fruit, sausage, or whatever you like.  Hopefully this will motivate you  to make stuffing this year.  Use your old favorite recipe, or try this one, but give it a shot.  It really isn't a feast without stuffing!  I use my Multigrain bread recipe, but if you like a lighter bread, try out the roll recipe, it is basically the same recipe with different flours.  This is easily made dairy and soy free.

Stuffing
1 loaf gf bread, cubed (about 8 c.)I have a mix available
1 onion, chopped(about 1 c.)
4 stalks celery, chopped (about 1 1/2c.)
¼ c. butter(or nondairy Earthbalance)
½ t. pepper
1 ½ t. thyme
1 ½ t. sage
1 t. parsley
1 t. poultry seasoning
1 ½ + c. water
2-3 T. chicken bouillon(I love the organic Better than Bouillon from Costco)


Saute onion and celery in butter until veggies are soft.  In a small bowl combine water and spices, including bouillon.  Mix bread with veggies and stir to combine.  Slowly add liquid, gently stirring until bread is coated.   Do not add all at once, but wait a minute for liquid to absorb or bread will turn mushy and crumble.  Add remaining liquid, until bread  coated, not too mushy.  Save any remaining liquid to add during baking.  Place stuffing in 9x13 pan and bake 45-50 min.  Stir half way through and add more liquid if necessary.
*Check back soon for a great pumpkin dessert that anyone can make, no "different" flours required!
**Check out some other stuffing recipes at Linda's Gluten free stuffing challenge